First Dylan and I ran around to several stores including Party City, Target, Bed Bath and Beyond, the local Mall to hit Hot Topic, and then finally Vitamin Shoppe.

 What you'll need:
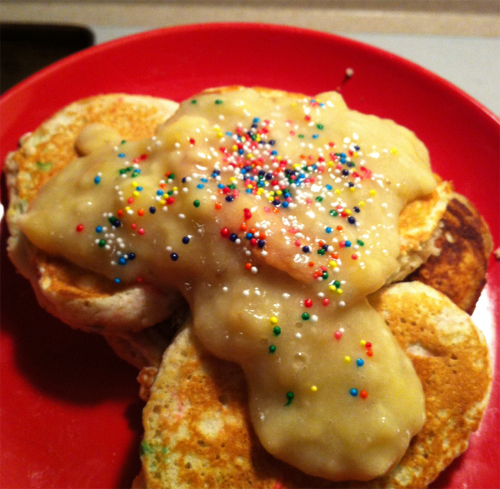
for the doughnuts-
1/4 cup (4 tablespoons) of coconut flour
1 1/2 scoop of vanilla flavored whey protein (I used Optimum Nutrition vanilla ice cream flavor)
1/2 cup of pure canned pumpkin
1 large whole egg
2 large egg whites
1 teaspoon of pure vanilla extract
1/4 cup of raw stevia
1/2 teaspoon of nutmeg
2 teaspoons of ground cinnamon
1/2 teaspoon of baking soda
1/2 teaspoon of cream of tartar
1/2 cup of vanilla unsweetened almond milk
for optional "frosting":
2 tablespoons of non-fat plain greek yogurt (I always use Chobani)
1/4 teaspoon of xanthan gum
2 packets of raw stevia
5-10 drops of vanilla creme liquid stevia
Preheat your oven to 350 degrees. Mix your wet ingredients for your doughnuts together and also the dry separately before combining and mixing well. Spray your doughnut baking pan (these could very easily be made into muffins as well!) with non-stick spray. Fill the molds with your batter. I baked mine for about 15-18 minutes. Toothpick should come out clean after sticking one into a doughnut. You can top it with the vanilla creme "frosting", more cinnamon, or pumpkin flavored cream cheese spread, or get creative. These are high in protein and low in active carbs. You could eat two (...or three) without the guilt! These would be good for pre or post workout as well.
I really can not wait to make up more doughnut recipes for you guys.
I also have been working on slowly sampling Artisana products that they were kind enough to send me to write a review for you guys. I should have that up at some point later this week. I have been sampling the packets slowly because I have cut nut butters out (except for peanut flour sparingly if I need it). I know, I am such a nut butter freak. I had to cut it out because I was getting out of control with the portioning and I also want to see how cutting out some fat does for my abs. I will be eating my beloved nut butter again very soon, but for now I have been forced to be creative with my nightly casein protein snack. I have been known for using a lotttt of peanut butter. But, I like having to think up some alternatives for a couple days.
 |
| This is so good and tastes kind-of like amazing pumpkin cream cheese. 1/2 cup plain non-fat greek yogurt (Chobani), 1/4 cup non-fat cottage cheese, 1/4 cup pure pumpkin, 1 scoop vanilla ice cream whey from Optimum Nutrition, ground cinnamon, pumpkin pie spice, 2 packets of raw stevia, and 1 tablespoon coconut flour. Mixed well topped with 1 tsp organic brown sugar, 1 tbsp coconut flour, and 1 packet of stevia along with 1 tablespoon of unsweetened almond milk and mixed well into a crumble-like texture. Finally, 2 tablespoons of Kashi go lean cinnamon crumble. |
 Another awesome purchase of mine this week was from Target. I finally was able to find tea that I have been looking quite some time for! Sugar Cookie Sleigh Ride by Celestial Seasonings! You probably are thinking, there is no way that a tea can taste like sugar cookies.. WRONG! This tea is so fantastic it is even boyfriend approved. With just some stevia and a little bit ok unsweetened almond milk to bring out the flavor, it tastes like a liquid cookie. Very good for soothing sweet tooth cravings like I get so badly! I also bought some French Vanilla coffee that was on sale and like most vanilla flavored things it is delicious. I gotta have a caffeine, one of my vices!
I hope you guys are having a great restful weekened!
Meg